vscode 源码解析 - contribution 插件化

看到插件化这个词,熟悉 vscode 的同学第一时间想到的可能是 Extension,例如 Prettier 插件、ESLint 插件等等。是的,这确实是非常典型的插件化设计(也是本系列文章打算着重分析的一块内容),但是这篇文章要讨论是 vscode 内部以插件化方式编写的各种功能,英文叫做 contribution。
这篇文章将会讨论以下问题:
- 什么是 contribution
- contribution 怎样拓展 vscode 的功能
- vscode 如何加载 contribution
什么是 contribution
contribution 就是功能,这些功能通过插件的形式编写,通过调用一系列更加底层的 API 来扩展 vscode 的能力。在 src/vs/workbench/contrib 目录中执行 tree 命令,可以看到 vscode 中大约有 68 种 contribution:
# in ~/Developer/OSS/vscode/src/vs/workbench/contrib on git:main o [23:53:08]
$ tree . -L 1
.
├── audioCues
├── bulkEdit
├── callHierarchy
├── codeActions
# .........
├── welcomeViews
├── welcomeWalkthrough
├── workspace
└── workspaces

68 directories, 0 files
例如有:
- files.contribution.ts 实现目录树功能
- outline.contribution.ts 实现文档内容内符号列表的功能
- format.contribution.ts 实现代码格式化功能
contribution 如何拓展 vscode 的功能
contribution 既然是以插件形式编写的 vscode 功能,所以我们自然好奇 contribution 如何扩展 vscode 的能力——反过来说,vscode 提供了哪些接口让 contribution 扩展功能。
实现功能拓展的主要是 vscode 中各种各样的 Registry,我们结合一个例子来看。文件管理功能是非常常用的功能,相关代码在 src/vs/workbench/contrib/files 目录下,它调用了如下 Registry:
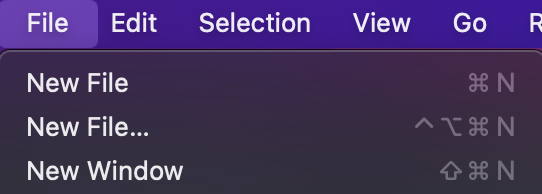
MenuRegistry以注册菜单项。下面这段代码,会在菜单栏中注册 New File 菜单项(注意这里用到了一个 keyNEW_UNTITLED_FILE_COMMAND_ID)
MenuRegistry.appendMenuItem(MenuId.MenubarFileMenu /* 菜单项注册的位置 */, {
  // 菜单项在哪个组当中
  group: '1_new',
  // 菜单项对应的命令
  command: {
    id: NEW_UNTITLED_FILE_COMMAND_ID,
    // 菜单项文案
    title: nls.localize(
      { key: 'miNewFile', comment: ['&& denotes a mnemonic'] },
      '&&New Text File'
    )
  },
  // 在组中的序号
  order: 1
})
KeybindingRegistry用以注册快捷键(可能也会同时注册命令)。下面这段代码,同时注册了NEW_UNTITLED_FILE_COMMAND_ID的命令以及快捷键,注意跟上面的菜单项注册的 key 相同,因此菜单栏中就会同时显示快捷键。
KeybindingsRegistry.registerCommandAndKeybindingRule({
  // 定义快捷键的权重
  weight: KeybindingWeight.WorkbenchContrib,
  // 定义快捷键触发的条件
  when: null,
  // 定义快捷键
  primary: isWeb
    ? isWindows
      ? KeyChord(KeyMod.CtrlCmd | KeyCode.KeyK, KeyCode.KeyN)
      : KeyMod.CtrlCmd | KeyMod.Alt | KeyCode.KeyN
    : KeyMod.CtrlCmd | KeyCode.KeyN,
  // 定义快捷键
  secondary: isWeb ? [KeyMod.CtrlCmd | KeyCode.KeyN] : undefined,
  // 每个 command 都有一个 id
  id: NEW_UNTITLED_FILE_COMMAND_ID,
  description: {
    description: NEW_UNTITLED_FILE_LABEL,
    args: [
      {
        isOptional: true,
        name: 'viewType',
        description: 'The editor view type',
        schema: {
          type: 'object',
          required: ['viewType'],
          properties: {
            viewType: {
              type: 'string'
            }
          }
        }
      }
    ]
  },
  // 该 command 具体的执行过程,通过 accessor
  // command 可以访问各种服务用于执行业务逻辑
  handler: async (accessor, args?: { viewType: string }) => {
    const editorService = accessor.get(IEditorService)

    await editorService.openEditor({
      resource: undefined,
      options: {
        override: args?.viewType,
        pinned: true
      }
    })
  }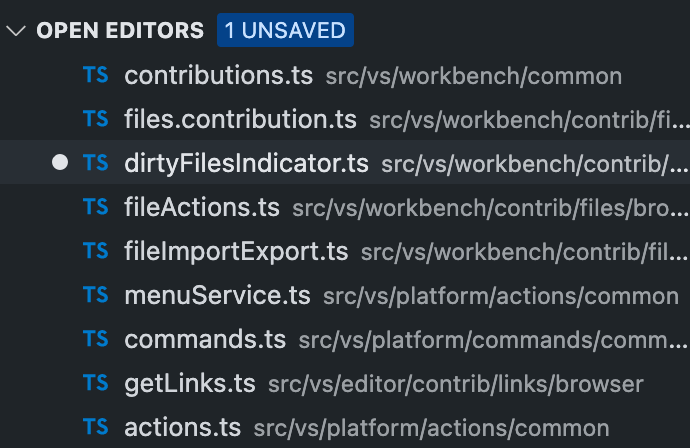
})WorkbenchContributionRegistry,这个 Registry 比较特殊,它要求调用方注册一个实现了IWorkbenchContribution接口的类,这些类可以通过依赖注入系统注入各种服务,因此可以灵活地实现一些功能,例如DirtyFilesIndicator,会在有文件未保存时显示一个 badge。
Registry.as<IWorkbenchContributionsRegistry>(
  WorkbenchExtensions.Workbench
).registerWorkbenchContribution(
  DirtyFilesIndicator,
  LifecyclePhase.Starting /* 注意这里要声明该 contribution 应当在 vscode 生命周期的哪个阶段加载 */
)EditorContributionRegistry,这个 Registry 和WorkbenchContributionRegistry类似,但它是对编辑器功能的拓展,且要求注册的类满足IEditorContribution接口,并且这些类在实例化的时候除了能够注入服务,还能够获得一个ICodeEditor对象,这样它们就能够直接访问编辑器。例如代码折叠相关的功能:
registerEditorContribution(FoldingController.ID, FoldingController)

export class FoldingController
  extends Disposable
  implements IEditorContribution
{
  constructor(
    editor: ICodeEditor,
    @IContextKeyService private readonly contextKeyService: IContextKeyService,
    @ILanguageConfigurationService
    private readonly languageConfigurationService: ILanguageConfigurationService,
    @INotificationService notificationService: INotificationService,
    @ILanguageFeatureDebounceService
    languageFeatureDebounceService: ILanguageFeatureDebounceService,
    @ILanguageFeaturesService
    private readonly languageFeaturesService: ILanguageFeaturesService
  ) {}
}
ViewContainerRegistry注册一个新的面板。例如下面这段代码注册了一个 Explorer 面板:
export const VIEW_CONTAINER: ViewContainer =
  viewContainerRegistry.registerViewContainer(
    {
      // 每个面板有其 DI
      id: VIEWLET_ID,
      title: localize('explore', 'Explorer'),
      // 面板的内容,包括如何渲染和功能逻辑
      ctorDescriptor: new SyncDescriptor(ExplorerViewPaneContainer),
      // 面板的 UI 排布是可以序列化存储的,这里需要制定一个 key
      storageId: 'workbench.explorer.views.state',
      icon: explorerViewIcon,
      alwaysUseContainerInfo: true,
      // 在 ActivityBar 当中的顺序
      order: 0,
      // 打开这个面板所对应的快捷键
      openCommandActionDescriptor: {
        id: VIEWLET_ID,
        title: localize('explore', 'Explorer'),
        mnemonicTitle: localize(
          { key: 'miViewExplorer', comment: ['&& denotes a mnemonic'] },
          '&&Explorer'
        ),
        keybindings: { primary: KeyMod.CtrlCmd | KeyMod.Shift | KeyCode.KeyE },
        order: 0
      }
    },
    // 面板所在的位置
    ViewContainerLocation.Sidebar,
    { isDefault: true }
  )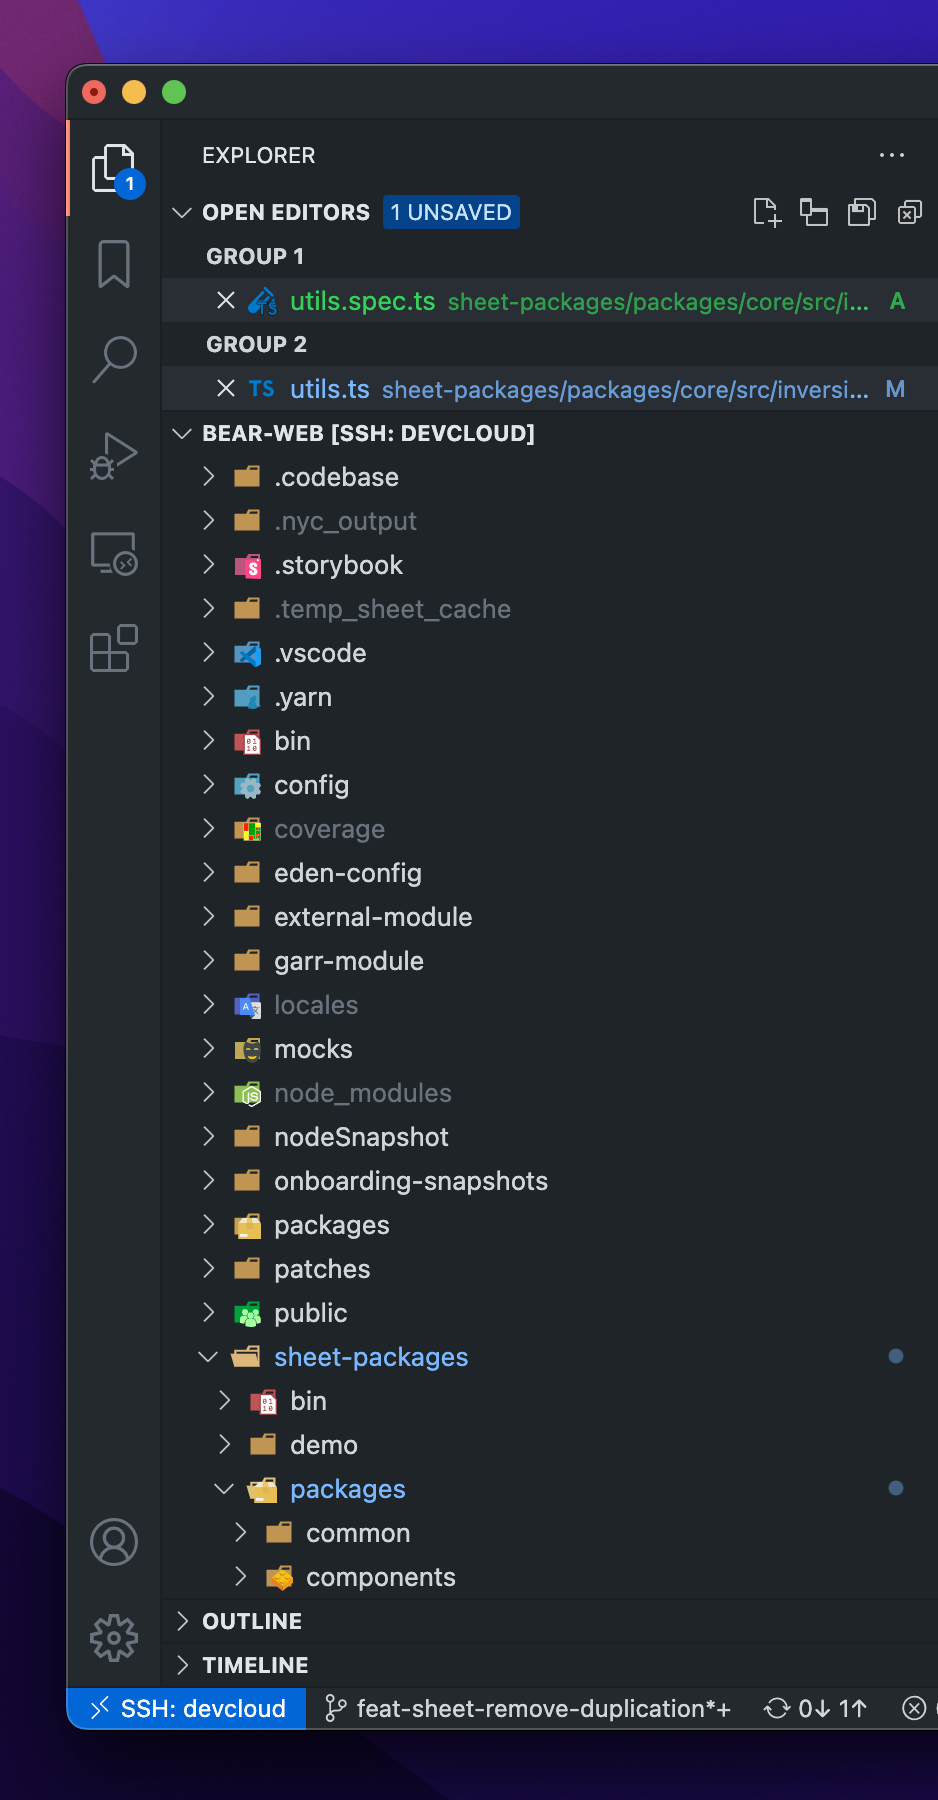
ViewsRegistry用以在面板中注册一个子面板,下面这段代码注册了 OPEN EDITORS 面板:
export class ExplorerViewletViewsContribution
  extends Disposable
  implements IWorkbenchContribution
{
  private registerViews(): void {
    const viewDescriptors = viewsRegistry.getViews(VIEW_CONTAINER)

    let viewDescriptorsToRegister: IViewDescriptor[] = []

    const openEditorsViewDescriptor = this.createOpenEditorsViewDescriptor()
    if (!viewDescriptors.some((v) => v.id === openEditorsViewDescriptor.id)) {
      viewDescriptorsToRegister.push(openEditorsViewDescriptor)
    }

    if (viewDescriptorsToRegister.length) {
      viewsRegistry.registerViews(viewDescriptorsToRegister, VIEW_CONTAINER)
    }
  }

  private createOpenEditorsViewDescriptor(): IViewDescriptor {
    return {
      id: OpenEditorsView.ID,
      name: OpenEditorsView.NAME,
      // 面板的实际内容
      ctorDescriptor: new SyncDescriptor(OpenEditorsView),
      containerIcon: openEditorsViewIcon,
      order: 0,
      when: OpenEditorsVisibleContext,
      canToggleVisibility: true,
      // 可以移动到其他 ViewContainer
      canMoveView: true,
      collapsed: false,
      hideByDefault: true,
      // 聚焦该面板的快捷键
      focusCommand: {
        id: 'workbench.files.action.focusOpenEditorsView',
        keybindings: {
          primary: KeyChord(KeyMod.CtrlCmd | KeyCode.KeyK, KeyCode.KeyE)
        }
      }
    }
  }
}QuickAccessRegistry用以在快捷面板中注册一种面板类型。文件管理功能没有调用这个 Registry,这里展示的是 “展示文件中的符号功能”。
Registry.as<IQuickAccessRegistry>(
  QuickaccessExtensions.Quickaccess
).registerQuickAccessProvider({
  // 面板的实际内容
  ctor: GotoSymbolQuickAccessProvider,
  // 快捷面板的前缀,这里的前缀就是 @ 符号
  prefix: AbstractGotoSymbolQuickAccessProvider.PREFIX,
  contextKey: 'inFileSymbolsPicker',
  placeholder: localize(
    'gotoSymbolQuickAccessPlaceholder',
    'Type the name of a symbol to go to.'
  ),
  // 在命令面板中注册进入该 Quickaccess 面板的命令
  helpEntries: [
    {
      description: localize('gotoSymbolQuickAccess', 'Go to Symbol in Editor'),
      prefix: AbstractGotoSymbolQuickAccessProvider.PREFIX,
      needsEditor: true
    },
    {
      description: localize(
        'gotoSymbolByCategoryQuickAccess',
        'Go to Symbol in Editor by Category'
      ),
      prefix: AbstractGotoSymbolQuickAccessProvider.PREFIX_BY_CATEGORY,
      needsEditor: true
    }
  ]
})
以上是一些比较常见的 Registry,其他 Registry 可以通过搜索 Registry.add 找到。
contribution 的加载
不同运行环境 contribution 的加载
vscode 能够运行两类环境当中:
- 浏览器环境,典型的如 GitHub CodeSpaces
- 桌面环境,即大家日常使用的 VS Code
不同的环境中,部分功能的行为可能并不一致,甚至有些功能只在某一环境中提供,那么这些有差异的功能是如何进行加载的呢?
src/vs/workbench 目录下有这样几个文件:
- workbench.desktop.main.ts 桌面环境入口文件
- workbench.sendbox.main.ts vscode 切换到 Electron Sandbox 模式后的入口文件,实际上 desktop.main.ts 正在逐步过渡到 sendbox.main.ts
- workbench.web.main.ts 浏览器环境的入口文件
- workbench.common.main.ts 桌面和浏览器环境复用的代码,web.main.ts 和 sandbox.main.ts 都引入了 common.main.ts
这三个文件都会引入 contributions:
// common.main.ts
//#region --- workbench contributions

// Telemetry
import 'vs/workbench/contrib/telemetry/browser/telemetry.contribution'

// Preferences
import 'vs/workbench/contrib/preferences/browser/preferences.contribution'
import 'vs/workbench/contrib/preferences/browser/keybindingsEditorContribution'
import 'vs/workbench/contrib/preferences/browser/preferencesSearch'

// ...
// web.main.ts
//#region --- workbench contributions
// Output
import 'vs/workbench/contrib/output/common/outputChannelModelService'
// Explorer
import 'vs/workbench/contrib/files/browser/files.web.contribution'
// Performance
import 'vs/workbench/contrib/performance/browser/performance.web.contribution'
// ...// sandbox.main.ts
//#region --- workbench contributions
// Logs
import 'vs/workbench/contrib/logs/electron-sandbox/logs.contribution'
// Localizations
import 'vs/workbench/contrib/localizations/browser/localizations.contribution'
// Explorer
import 'vs/workbench/contrib/files/electron-sandbox/files.contribution'
import 'vs/workbench/contrib/files/electron-sandbox/fileActions.contribution'
// ...所以,vscode 在不同环境加载不同功能的方法就是在不同环境的打包入口引入不同的功能文件。
一些 contribution 在实现的时候就是区分了 browser 和 electron-sandbox 的,例如 terminal 功能,在浏览器环境和 Electron 引入的文件就分别是 terminal.web.contribution 和 electron-sandbox/terminal.contribution 。
IWorkbenchContributionRegistry 的加载和初始化
在 workbench 启动的时候,会调用 IWorkbenchContributionsRegistry 的 start 方法,该方法会在 vscode 生命周期的各个阶段激活不同的 contribution。
class WorkbenchContributionsRegistry
  implements IWorkbenchContributionsRegistry
{
  private instantiationService: IInstantiationService | undefined
  private lifecycleService: ILifecycleService | undefined

  private readonly toBeInstantiated = new Map<
    LifecyclePhase,
    IConstructorSignature<IWorkbenchContribution>[]
  >()

  registerWorkbenchContribution(
    ctor: IConstructorSignature<IWorkbenchContribution>,
    phase: LifecyclePhase = LifecyclePhase.Starting
  ): void {
    if (
      this.instantiationService &&
      this.lifecycleService &&
      this.lifecycleService.phase >= phase
    ) {
      this.instantiationService.createInstance(ctor)
    }

    // Otherwise keep contributions by lifecycle phase
    else {
      let toBeInstantiated = this.toBeInstantiated.get(phase)
      if (!toBeInstantiated) {
        toBeInstantiated = []
        this.toBeInstantiated.set(phase, toBeInstantiated)
      }

      toBeInstantiated.push(
        ctor as IConstructorSignature<IWorkbenchContribution>
      )
    }
  }

  start(accessor: ServicesAccessor): void {
    const instantiationService = (this.instantiationService = accessor.get(
      IInstantiationService
    ))
    const lifecycleService = (this.lifecycleService =
      accessor.get(ILifecycleService))

    ;[
      LifecyclePhase.Starting,
      LifecyclePhase.Ready,
      LifecyclePhase.Restored,
      LifecyclePhase.Eventually
    ].forEach((phase) => {
      this.instantiateByPhase(instantiationService, lifecycleService, phase)
    })
  }
}
这里 vscode 做了一个性能优化,对于需要在 Eventually 阶段加载的功能,vscode 不会将它们立即初始化,而是利用 CPU 闲时分批将它们初始化。
class WorkbenchContributionsRegistry
  implements IWorkbenchContributionsRegistry
{
  private doInstantiateByPhase(
    instantiationService: IInstantiationService,
    phase: LifecyclePhase
  ): void {
    const toBeInstantiated = this.toBeInstantiated.get(phase)
    if (toBeInstantiated) {
      this.toBeInstantiated.delete(phase)
      if (phase !== LifecyclePhase.Eventually) {
        // instantiate everything synchronously and blocking
        for (const ctor of toBeInstantiated) {
          this.safeCreateInstance(instantiationService, ctor) // catch error so that other contributions are still considered
        }
      } else {
        // for the Eventually-phase we instantiate contributions
        // only when idle. this might take a few idle-busy-cycles
        // but will finish within the timeouts
        let forcedTimeout = 3000
        let i = 0
        let instantiateSome = (idle: IdleDeadline) => {
          while (i < toBeInstantiated.length) {
            const ctor = toBeInstantiated[i++]
            this.safeCreateInstance(instantiationService, ctor) // catch error so that other contributions are still considered
            if (idle.timeRemaining() < 1) {
              // time is up -> reschedule
              runWhenIdle(instantiateSome, forcedTimeout)
              break
            }
          }
        }
        runWhenIdle(instantiateSome, forcedTimeout)
      }
    }
  }
}
总结
这篇文章到这里就打住,简要介绍了 vscode 功能插件化的设计:
- contribution 是 vscode 内部插件化的代码组织和功能加载方式
- 通过在不同的入口引入不同的 contribution,vscode 可以做到不同平台有不同的实现
- 插件化的具体实现方式是 contribution 在 Registry 上进行注册,并由不同的模块执行注册项
- 通过依赖注入系统管理 contribution 的依赖
- 通过将 contribution 划分在不同的生命周期,同时对于最后一个生命周期加载的 contribution 执行懒加载